The new site is up! Take a look: Oldfangled.Wordpress.com
Changes!
26 Nov 2010 2 Comments
in writing
Greetings, lovely readers.
Since it’s the season for giving thanks, the first thing I want to do is thank you for reading and commenting. I really enjoy writing, and it’s nice to have an audience. I think that by continuing to write, I’m developing my style and my interests, and that’s really fun for me. I hope it’s fun for you, too.
I’ve been blogging for about a year and a half, and I’m ready to make some BIG changes!
As time has passed, I’ve realized that Small Town Runner isn’t the best name for my site or my online identity. I am a runner, and I do live in a small town, but those characteristics are only a small part of who I am. I really started thinking about what really, truly characterizes me, and the name Small Town Runner just doesn’t quite do it.
Also, I’ve been wanting to have my own domain name. The idea for an online identity shift (sounds like a psychiatric disorder!) was affected by that desire as well, because as I looked into getting my own domain, there was already a blog called SmallTownRunner.com (although it hadn’t been updated in years) and a Twitter account with the user name @SmallTownRunner (so I had to change mine to @Small_Town_Runr, which I never really liked.)
In thinking about getting my own domain, I also decided that I wanted to shift to another platform that would give me more flexibility with what my site looks like (for example, having multiple dynamic pages and more control over design templates) while still remaining very easy to use. I don’t want to learn HTML or CSS.
So the changes are coming in December! I’ll be changing my site to one powered by Squarespace, and I’ll have a new name and a new identity. The new site will still have much of what I have been doing — talk of food, gardening, home life, running, and becoming debt free — but I’m going to add some new things, too.
One of the first items I’m going to add is menu planning. I know that if I don’t have a plan, I tend to wander around the kitchen, staring into the cupboards until I’m ravenous. I bet a lot of you are that way, too. Planning my meals has been a huge sanity-saver for me. I am very lucky in the fact that my husband is a fabulous cook and helps out a lot with meal preparation. But a lot of households have just one person trying to plan and cook meals every day, and they would love to have a list of ideas to choose from. While there may be more comprehensive menu plans out there, I hope the one I have will be a good starting place for fellow kitchen-wanderers. And it will be FREE!
I’ve got other ideas on additions to the site, as well, but I want to do a little at a time so I don’t overwhelm myself.
In just a couple of days, I’ll put up another post pointing you to my new website. I hope to import all my other blog posts to the new site, too, so everything will be kept together.
If you happen to follow me on Twitter, you’ve already started to see some changes. But fret not. You’ll get the whole scoop soon.
The Small Town Runner site will be quiet for a few days while I get everything worked out. I hope it won’t take too long, and I intend to be blogging at the new place by the second week of December, and maybe even by December 1.
I hope you’ll continue to follow me in my new location with my new name!
Turkey Trot
25 Nov 2010 4 Comments
in Bunion Adventures, running Tags: Turkey Trot
This morning, I’m going to run a Turkey Trot.
When I went back to the doctor on November 12, which was eleven weeks post-op, he said I could do some light jogging. I was ecstatic, and that afternoon I went out and ran a mile.
My foot was fine. The rest of my body was wondering what the heck I was trying to do.
Thankfully, anything with the name “Turkey Trot” is likely not going to be competitive. I think the course is three miles, and I honestly don’t know how much of it I’ll be able to run. I haven’t run more than a mile at a time since I had my surgery. I could maybe push it and run two miles, but three? I might collapse in a heap because my legs have forgotten what it is to run. And by that time, my foot might be swollen enough to rival the gigantic Snoopy balloon in the Macy’s Thanksgiving Day Parade.
But I’m still going to try. Because it’s only two weeks until my second surgery, and then three months after that before I’ll be permitted to run again.
So, I might just be trotting, or even walking — heck, maybe just strolling. But I’m going for it anyway.
Pattern: Knitted Hat
24 Nov 2010 2 Comments
in home Tags: boucle yarn, free knitted hat pattern
I was working on my Christmas gifts, and I knew I wanted to make hats for some of my family and friends. I have a ribbed hat pattern that I make most often, but a couple of years ago I had found a pattern that I liked as a woman’s hat. It just had a softer look to it. The pattern was really easy and I made myself a hat from that pattern.
The only problem was that when I went to pull that pattern out to make hats this year, I couldn’t find it! So I made my own pattern. It’s easy, and all you need are a couple of circular needles.
Woman’s Knitted Hat Pattern
Materials: size 7 circular needle, size 9 circular needle, your choice of yarn (medium weight works well, and I think boucle yarn is best)
Cast 56 stitches onto size 7 needle. Knit 2, purl 2 around (ribbing) for three inches.
Switch to size 9 needle. Knit around for one row. For the next 6 rows, knit around, increasing once per row, resulting in 62 stitches. Continue knitting around until entire work measures about 9 inches.
(Knit 2, knit 2 together) around.
Knit around.
(Knit 2 together, knit one) around.
Knit around.
Knit 2 together around.
Knit around.
Cut yarn to about 8 inches and draw through the loops. Pull tight. On the inside of the hat, weave end of yarn in and secure.
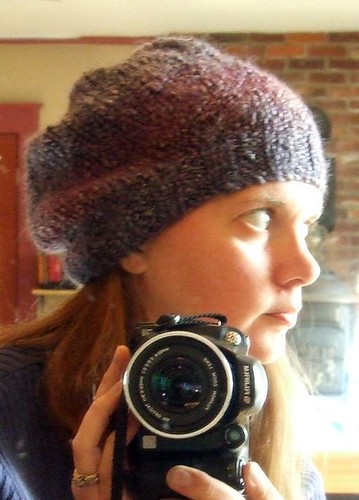
I’ve made three hats like this. The one I like best is made with a boucle yarn, which is very soft and flexible. Because the yarn isn’t stiff, the hat has a nicer shape, I think.
The first one pictured is made from basic worsted weight yarn (in black) and some sparkly silver stuff my mother-in-law brought me from Spain.

The second one is made from some random yellow yarn that someone gave me. It was a remnant at a fabric store, so the original label wasn’t on it. I’m not sure the details. It was fuzzy, but a little bit stiff.
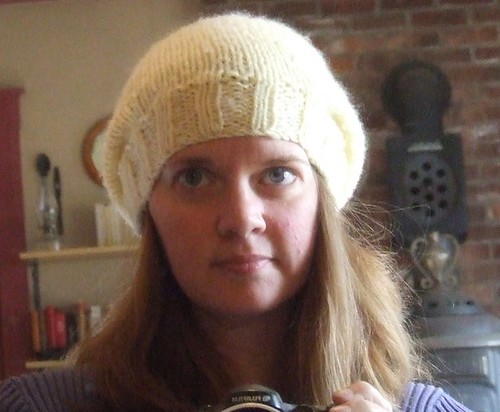
The last one is in the purple boucle yarn. It’s definitely my favorite. I think it looks the nicest, and it’s the most comfortable to wear.
Buying Brand Name
23 Nov 2010 6 Comments
in becoming debt-free Tags: batteries, laundry detergent, light bulbs, plastic baggies, plastic wrap
When I go to stores, I’m always looking for the cheapest prices. I don’t want to pay more than I need to, especially if there isn’t a big difference in quality. So I go for generics on a lot of things. But I’ve discovered a few things that I will always buy brand name.
Laundry Detergent. I’ve purchased generic detergent for years, and I always wondered why my clothes looked dingy. Duh. All my synapses weren’t firing on that one. I have just a few more loads left with the cheap-o detergent I bought last time, and then I’m going with Tide. (After all, it’s what God cleans the oceans with!)
Batteries. Let me tell you, Dollar General batteries aren’t worth snot. They just don’t last. From now on, I will buy Duracell or Energizer or something. But no more generic batteries.
Light Bulbs. Generic light bulbs also don’t last. I stick with GE, Philips, Sylvania, or Westinghouse.
Plastic Wrap. More curse words have been uttered in my house because the stupid store brand plastic wrap won’t tear on the stupid store brand metal strip, and then the wrap gets all wrinkled and you can’t put it on the food, which hardly matters because the plastic won’t stick to the bowl anyway. I now buy Saran Wrap.
Plastic Baggies. For the fold-over kind, generic is okay. But if you want the kind you can re-close, go with Zip-loc or Glad. I’ve had generic baggies that won’t close, or they close, but then they won’t open and I end up tearing the bag above the zipper which means that now there’s not enough for the fingers to grab onto in order to open the bag, so you have to tear the whole thing open. Plus, the store brand bags get holes in them a lot more easily than the brand name bags.
I figure I’m not saving money if I have to throw stuff away more often, which is what happens with the items I’ve listed when I buy generic or store brand.
That’s my list. Did I miss anything? For what items do you insist on brand names?
House of Lords
22 Nov 2010 1 Comment
in family, home Tags: Wirehaired Pointing Griffon
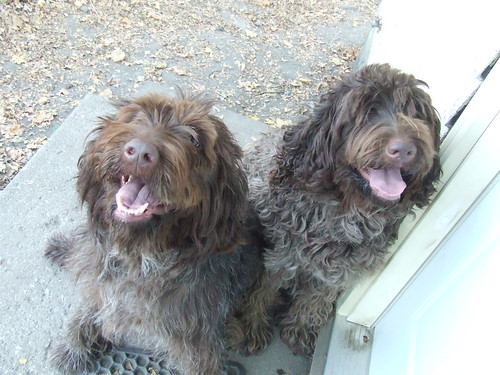
Usually, our dogs are just called Gracie and Gryffon.
Sometimes they have nicknames like Gryffie-dog and Gracie-girl. Or Sweetie-pee and Sweetie-poo. Or when they are in trouble, sometimes we call them by their full names, Gracie Capella and Gryffon Arcturus.
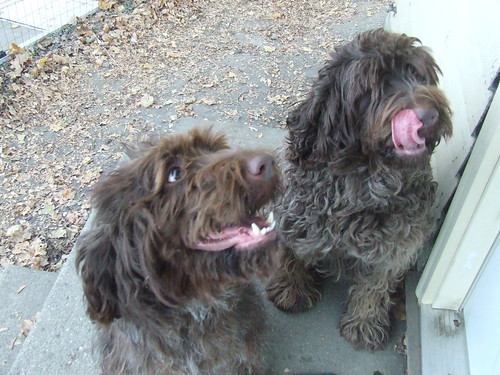
But in the fall, they become Lord and Lady Leafbottom.
Want to know why?
Take a look:

Masquerading as Rich
19 Nov 2010 2 Comments
The last thing I do for work each day is stop by the bank and make the day’s deposit.
The weather was beautiful last week, so I had my car windows down as I sat in the drive through at my local financial institution. I had pulled up behind a beautiful, shiny, new-looking black Lexus ES330. And while I wasn’t trying to eavesdrop, I overheard the woman in the Lexus talking to the teller about accessing money in her line of credit.
When I see a Lexus, I always think of Wealth. Luxury. Money. And I suspect that’s what Lexus — and Lexus owners — want me to think. So it was rather amusing (in a sad sort of way) to hear this Lexus owner discuss getting deeper in debt.
The transaction between the teller and the owner of the ES330 was taking a while, and as I waited, another car pulled into the next lane. This one was a beautiful, shiny, new-looking black Lexus ES350.
The two Lexus owners seemed to know each other. They rolled down their windows and greeted one another. And again, while I wasn’t trying to eavesdrop, I couldn’t help but overhear part of their conversation. ES350 was talking to ES330 about some sort of bill (property taxes, perhaps?) and she said, “Oh, crap. It’s the 10th, isn’t it? Well, I’m late again.”
And it just struck me that here are two women, both owners of really nice cars. One is deepening her debt and the other doesn’t pay her bills on time.
And I sat there, in my 1999 Volkswagen with the cracked leather interior, the heated seats that don’t work, and the temperamental transmission sensor, knowing that we are paying our bills on time and reducing our debt as quickly as possible. We stick to a written budget. If we don’t have the money, we don’t spend the money.
I’m not trying to sound all arrogant here. We weren’t always so responsible with our finances. We have purchased things in the past that we really couldn’t afford, and we’ve paid more money in interest charges than I care to think about.
But we are done pretending to be rich people. Instead, we’re starting to ACT like rich people, which means that we’re getting rid of debt and figuring out ways to make money grow. We’re not going to buy fancy cars when serviceable cars do the job. Most of my clothes are several years old, and I’m not the best-dressed person around. I don’t get hundred-dollar haircuts (and if I can get them for free, even better!) and I don’t have a fancy cell phone.
But we’re making progress. And someday, when I can really, truly afford to buy a Lexus…
I’ll probably still be driving my old VW.
Cozy Warm
18 Nov 2010 2 Comments
in becoming debt-free, home Tags: firewood
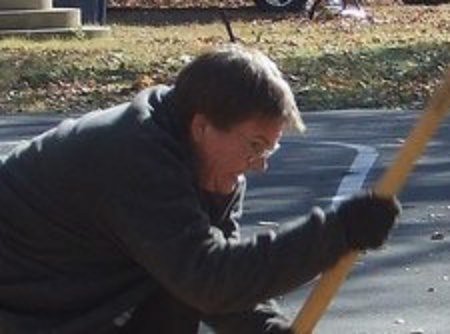
The sound and smell of a gas chainsaw brings back memories of childhood for me.
When I was small, my parents heated our home with a wood-burning stove. They would spend summer and fall preparing for winter by driving to Hoosier National Forest, where my mother’s family owned some land and a cabin, searching out dead trees and fallen wood. While we kids would play, swinging from gigantic vines over deep ravines, they and some of my aunts and uncles would cut the wood with gas chainsaws and load it into pick up trucks to take back home.
This was before the threat of the Emerald Ash Borer essentially stopped all transport of firewood across county lines.
Once the wood was at home, my dad (and sometimes my mom) would work on splitting the wood with a sledgehammer and some wedges. They’d stack the wood neatly in various places in the yard so that it was easily accessible.
The wood stove was in the basement, directly beneath one of the bathrooms. I can remember wearing my red flannel Holly Hobby nightgown and standing in the bathtub, feeling the warmth of the furnace on my bare feet. That bathroom always seemed to be the warmest place in the house.
Chef and I have a gas furnace in our house, but we do like to use our wood stove as much as possible. So when some friends had a dead tree and offered us the wood, we snapped it up.
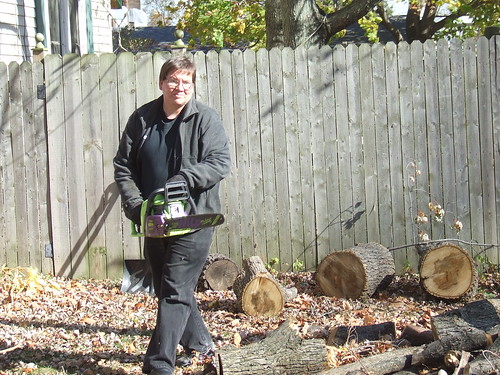
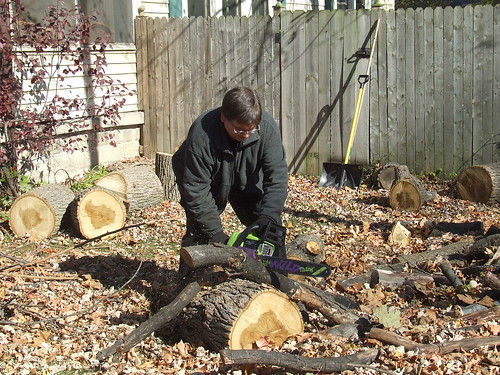
It’s been sitting in our yard for a while, and last week, Chef got a chance to work on cutting it up.

The sound of the chainsaw brought back memories.
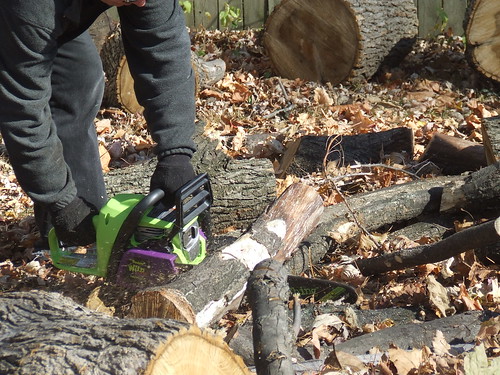
The smell of the exhaust mingled with the scent of sawdust took me back to childhood.
Then the sledgehammer and wedges came out.

Isn’t he manly?
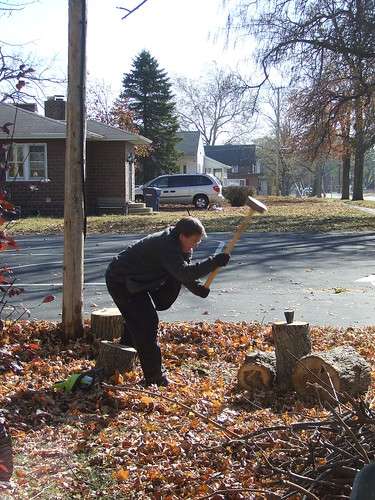
Get a load of that FACE!
And while I don’t stand in the bathtub in my red flannel Holly Hobby nightgown anymore, I do like to cuddle up in front of the fire, cozy under a blanket, drinking some tea and reading a book. Wood heat just feels nicer than the heat from our gas furnace, for some reason.
And the reduced gas bill feels nice, too.
Favorite Tea
17 Nov 2010 9 Comments
When cold weather arrives, I drink a lot more tea. I do drink tea when it’s warmer outside, too, but I gravitate more toward hot drinks when the temperatures dip below 55.
Some teas are nicer when it’s warm out. I like light, fruity tea in the spring and summer. But when the leaves turn and I consider pulling on my long underwear, I like richer teas with warmer flavors.
This Lemon Ginger tea by Stash has an almost spicy warmth to it. The ginger causes a slight burn in the back of the throat. I like this one especially when I’m starting to feel a little under the weather, but it’s nice any time I want something that’s not too heavy but plenty warm. It is really good with some honey in it.

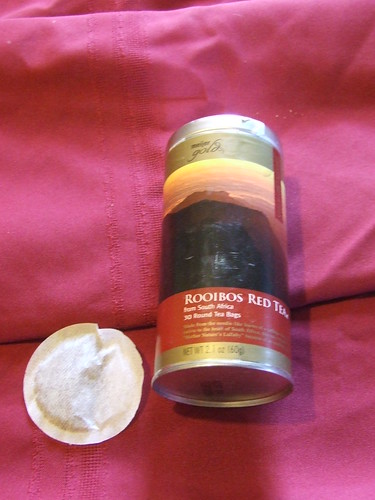
The Meijer Gold Red Tea is darker and richer. It doesn’t have a heavy taste at all, but still feels almost like it’s coating my tummy with a nice warm blanket.
Thanksgiving and Christmas make me think about cranberries, and this year I really discovered how much I really love cranberries. This Trader Joe’s tea combines cranberries with green tea.

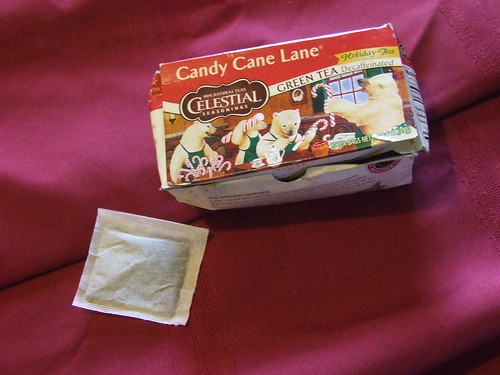
“Candy Cane Lane” from Celestial Seasonings pairs green tea with peppermint. I didn’t think I’d like it. I’ve not been a huge fan of green tea over the years, and while I’ve come to appreciate it, I didn’t think I’d like it with peppermint. I was very wrong! This tea is great with a little bit of sugar. Perfect for drinking while watching Christmas specials on TV.
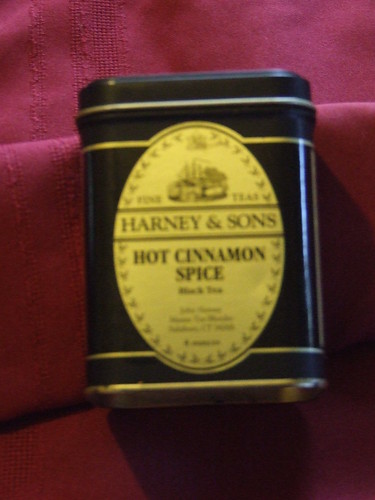
This cinnamon tea from Harney & Sons is the heaviest of the teas I’ve got today. It’s a loose leaf tea, and you actually have to be careful not to get too much in your tea ball, or the taste will be overwhelming. It’s a black tea with plenty of cinnamon. It’s so dark it almost looks like black coffee. Because this one is so rich and warm, it’s the one I choose on the coldest days, before the fire in the wood stove has heated up the house.
Do you have any favorite teas for fall and winter? Please share! I’m always looking for good, new flavors in my cup.
My Life as a Research Subject: Part Four (Or, You Have an Incurable Disease. Oh, wait. No, You Don’t.)
16 Nov 2010 5 Comments
in adventures, becoming debt-free Tags: medical research study
I’ve been telling you about my participation in a clinical research study for a medication to prevent menstrual migraines. At first, I thought it was going to be easy money. Then I met Dumb Nurse, and things went downhill. In Part Three, I told you the events that led me to feeling done with this study.
And yet, I wasn’t done.
Oh, unfortunate me.
The third week of October, I got a couple of calls from the research center. Since I didn’t have or want any further appointments with them, I did not answer and let the calls go to voicemail. The messages stated that they had lab results back that they wanted to give me. I thought they had given me all my lab results — I’d had high liver enzymes and then they re-tested and everything was normal again, and they’d given me those results already. So twice I ignored the messages.
On the last Wednesday of October, I got yet another call from the research center. Wanting to get them off my back for good, I finally answered. The girl said that they had lab results in, and the doctor wanted me to come down and discuss it with him.
I said, “No, I’m not making any more appointments.”
She said, “Um… well, the doctor really wants to see you about these results.”
I told her to send them to my family doctor and I would review the results with her. I had an appointment in two days anyway.
The girl said, “Um… well… can I just give you the results?”
Big sigh. “Fine.”
“You tested positive for Hepatitis B.”
Shock and silence. Then, “How in the world would I have contracted that?”
“Well,” she said, “it’s contracted through bodily fluids.”
Now, I work in a doctor’s office, but I have almost no contact with patients. I haven’t had a blood transfusion. I haven’t gotten any tattoos or had any acupuncture. I don’t do drugs (so I don’t share needles), and my husband and I are monogamous. So I basically have zero risk factors for contracting Hepatitis B.
The girl continued, “The doctor wants to see you back for treatment. He’ll treat you for free. And if it makes a difference, the employee you had a problem with previously no longer works here.”
My head is still spinning. “I need to think about this. Send the records to my family doctor and I’ll discuss it with her,” I said. And have her re-test me, I added silently.
So, like all patients do these days, I Googled Hepatitis B and confirmed that I had no risk factors. Then I started thinking… I had a vaccine for some kind of hepatitis about ten years ago. Which hepatitis was that?
After doing a little more internet research, I determined that it was indeed Hepatitis B that I had been vaccinated against. And I know that when you have a vaccine, sometimes those antibodies stay in your system and cause false positive results on blood tests. Chef has experience with this because he had a TB vaccine as a child. He was born in Germany, where that vaccine is common, although it is not given in the U.S. So every time he gets a TB test, the results show he’s positive. It’s a real pain in the neck.
But Hep B vaccines are relatively common these days, and I would certainly have thought that a doctor’s office would know how to interpret the results — or at the very least, ask the patient if she had ever been vaccinated. They never asked me that question.
That is, not until the phone rang again.
It was the same girl from the research center who had called about 45 minutes earlier. “Um… I was just looking at your results again, and, um… have you ever have a Hepatitis B vaccine?”
Why yes, yes I have, I assured her, in a much nicer tone than I was feeling.
“Well, these results may be because you had the vaccine.”
“Yeah, I finally figured that out on my own.”
She began to apologize.
I said, “Look. I’m not necessarily upset with you, but this just goes back to the problems I’ve had with your facility all along.” And while I didn’t use the word “incompetent” I’m pretty sure I gave her the idea that that’s the word I was thinking.
First she tried to shift the blame, then she tried to tell me how she “went the extra mile” to look into it more after she’d called me.
And I said, “Well it would have been really nice if someone had done that before you called me and I freaked out for an hour.”
She apologized again and made some excuse and said, “Well, that’s why I called you back,” as if that was going to make me ever-so-grateful.
I said, “But you don’t call someone and tell them they have an incurable disease before you have all the facts. That is not okay.”
After a stunned silence, she apologized again.
“Thanks,” I said, and I hung up.
I don’t know that I’ve ever been so angry. I had become worried — for my own health and the health of my husband — because they didn’t do their jobs before calling me.
Two days later, I went to see my family doctor who reviewed the results with me in detail, taking a lot of time to look things up to make sure she had the information correct. She showed me what she had found and went over the results carefully, making sure I understood. She assured me that the reason the test (one of three tests, actually) came back “reactive” was because I’d had the vaccine. I have new-found love for my doctor.
And I will never participate in a research study again.
Ironically, as I was writing this post, that stupid center called me again. It was the center director who said that the doctor was there and wanted to talk to me about my lab results.
Now, in case I haven’t made it clear, I HAVE HAD IT WITH THIS RESEARCH CENTER.
So I said, “No.”
“Well, he just wants to go over the information with you,” she said.
“No!” I repeated. “I don’t want to talk to anyone from your center again. I’ve already gone over the results with my family doctor who assured me that the reason the results came back the way they did is because I had a vaccine.”
“Well, that’s why we were calling. He wanted to go over that with you.”
“NO,” I said again. ” You don’t call people and tell them they have Hepatitis B without having your facts straight. I don’t want you people to call me ever again.”
Oh yeah. I said “you people.”
And then I hung up on her.
Now, are we done? I certainly hope so. I really don’t want to write Part Five in this series.
So the question: Was the money worth it?
H- E-Double Hockey Sticks, no.
Sorry for my language. I know my nieces and nephews sometimes read my blog. But this time, it had to be said.
Okay. I’ve got that out of my system.
And thankfully, I don’t have an incurable disease.
